

DIY Winter Planter Arrangements
Towards the end of summer I found some gorgeous cast iron urn planters at a local antique shop. They were in need of a little TLC but after having them professionally sandblasted, applying some oil based primer, and a coat of black paint they came out awesome.
I was so excited to make arrangements in them for the holidays. I browsed Pinterest for some inspiration and also watched some YouTube tutorials. Here are some step by step instructions and tips as to how to put these arrangements together.
By the way, in my urns I did insert plastic liners then I filled it with soil. I have seen some arrangements made with floral foam as well.
Step 1: Gather Materials
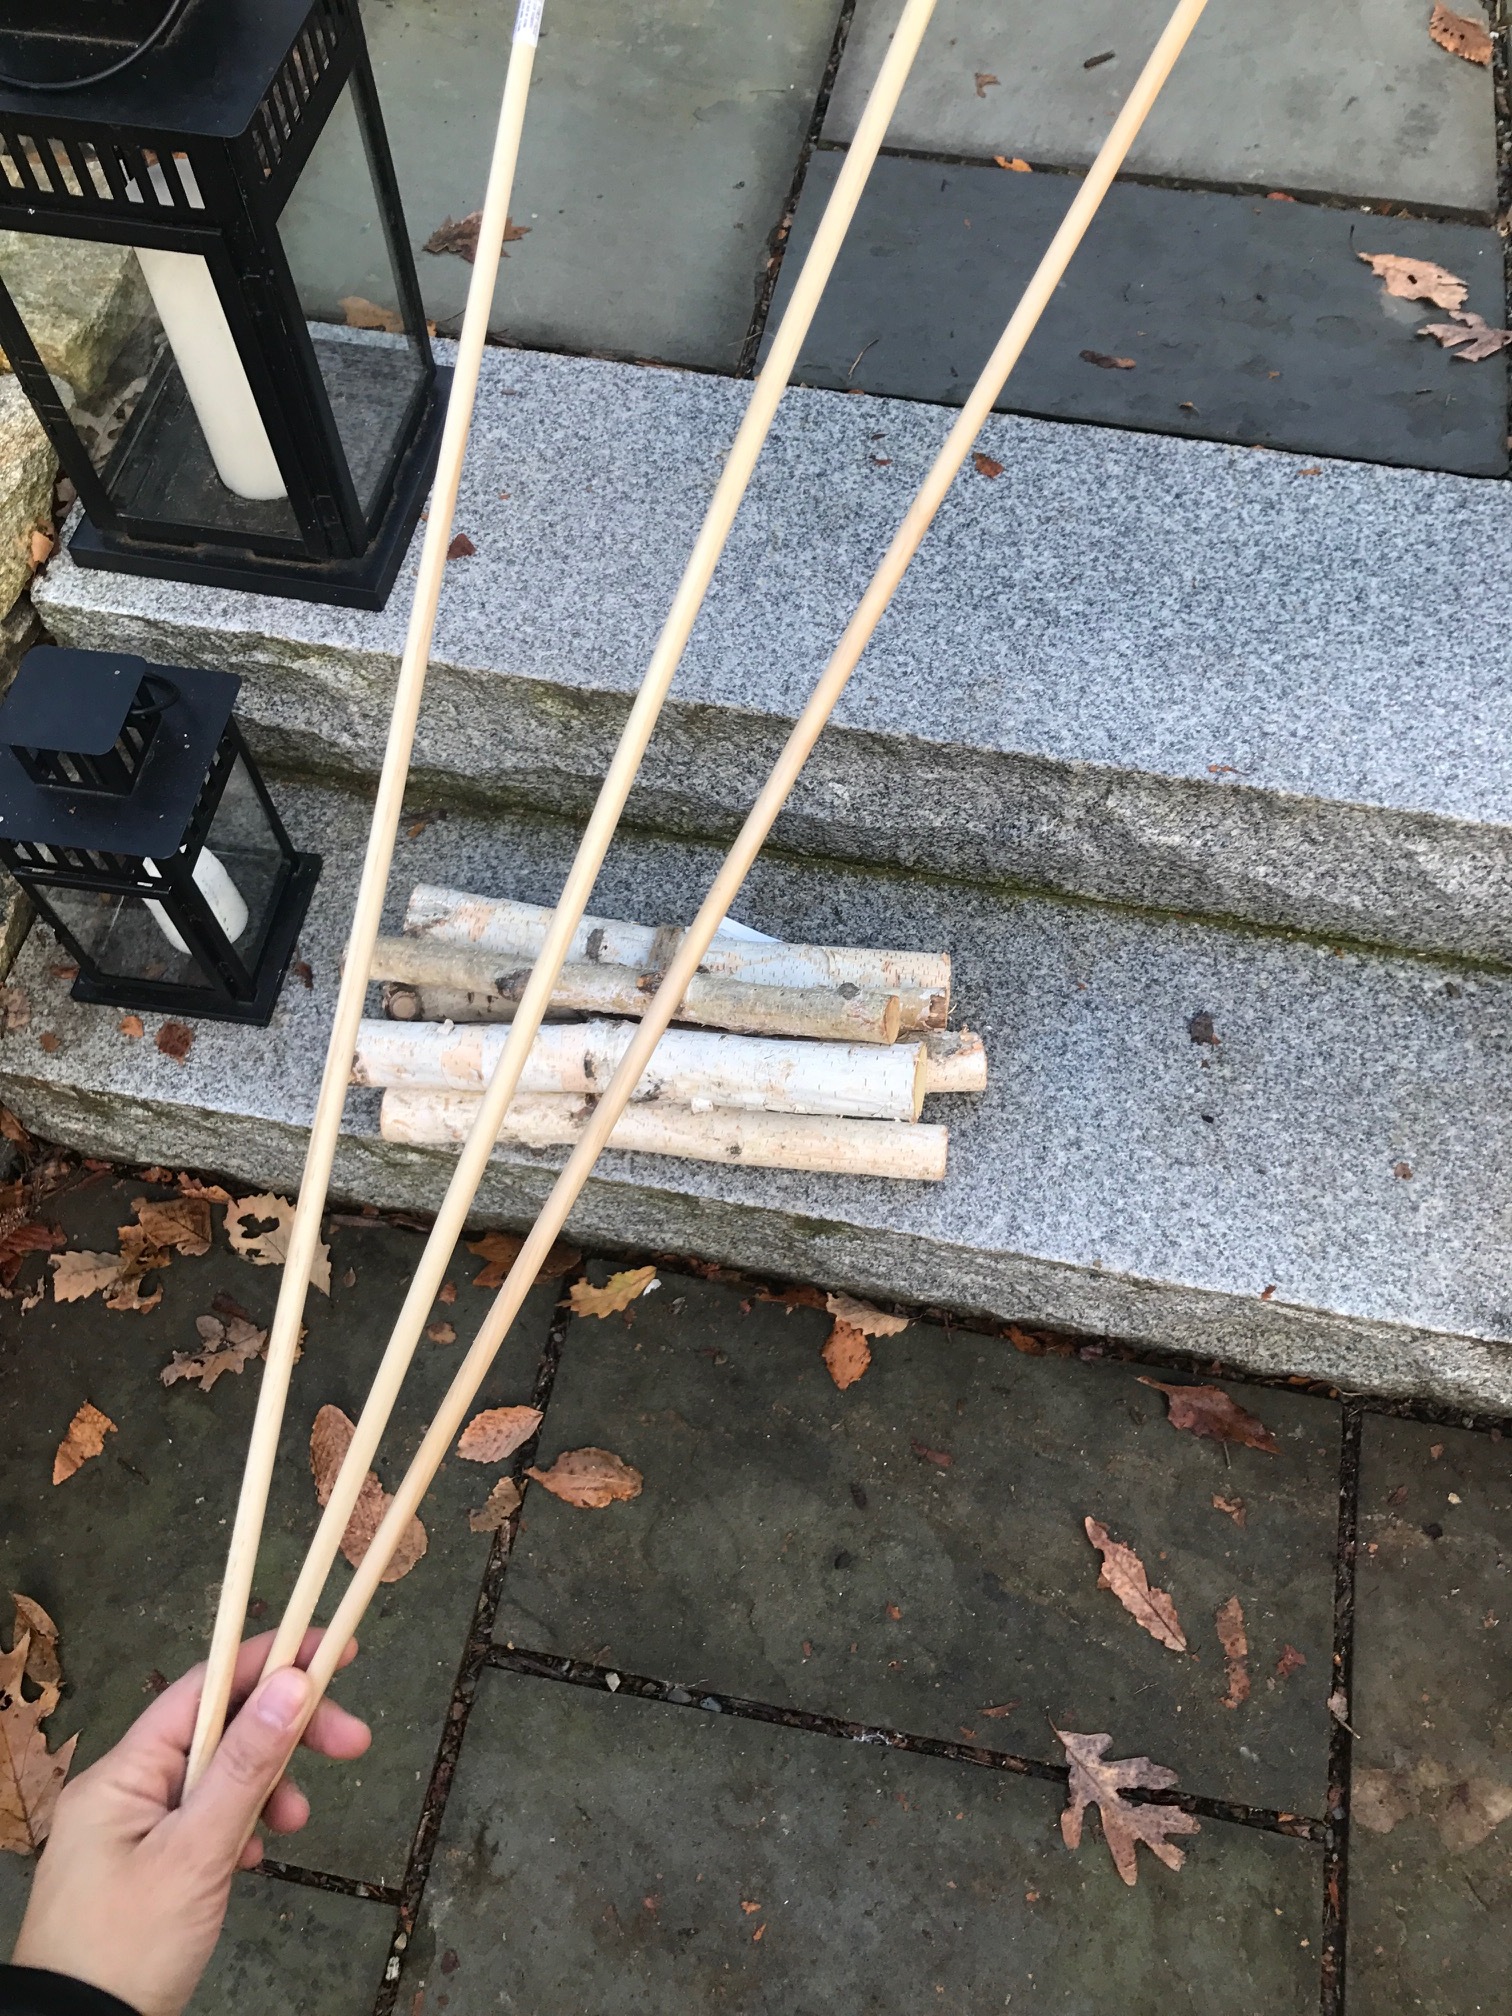
I knew I wanted a variety of greenery for my arrangements, as well as some thinner birch branches, logs, berries, and pinecones.
Home improvement stores (like Home Depot and Lowe's) and nurseries will sell bunches of all types of cut winter greenery, but I recommend seeing what you can cut down on your own first.
I actually did get a bunch of short needle fir trimmings (leftover from people's trees being trimmed) at Lowe's. They were in a big barrel and were FREE!
I was able to get the longer needle, pine branches from my neighbors yard, as well as some holly. My mother in law gave me the large pine cones, I did purchase one bunch of boxwood (at Home Depot), and the artificial berries were purchased at Michael's as well as the bunches of birch logs. So given the fact that most of my materials were free, this project was pretty inexpensive.

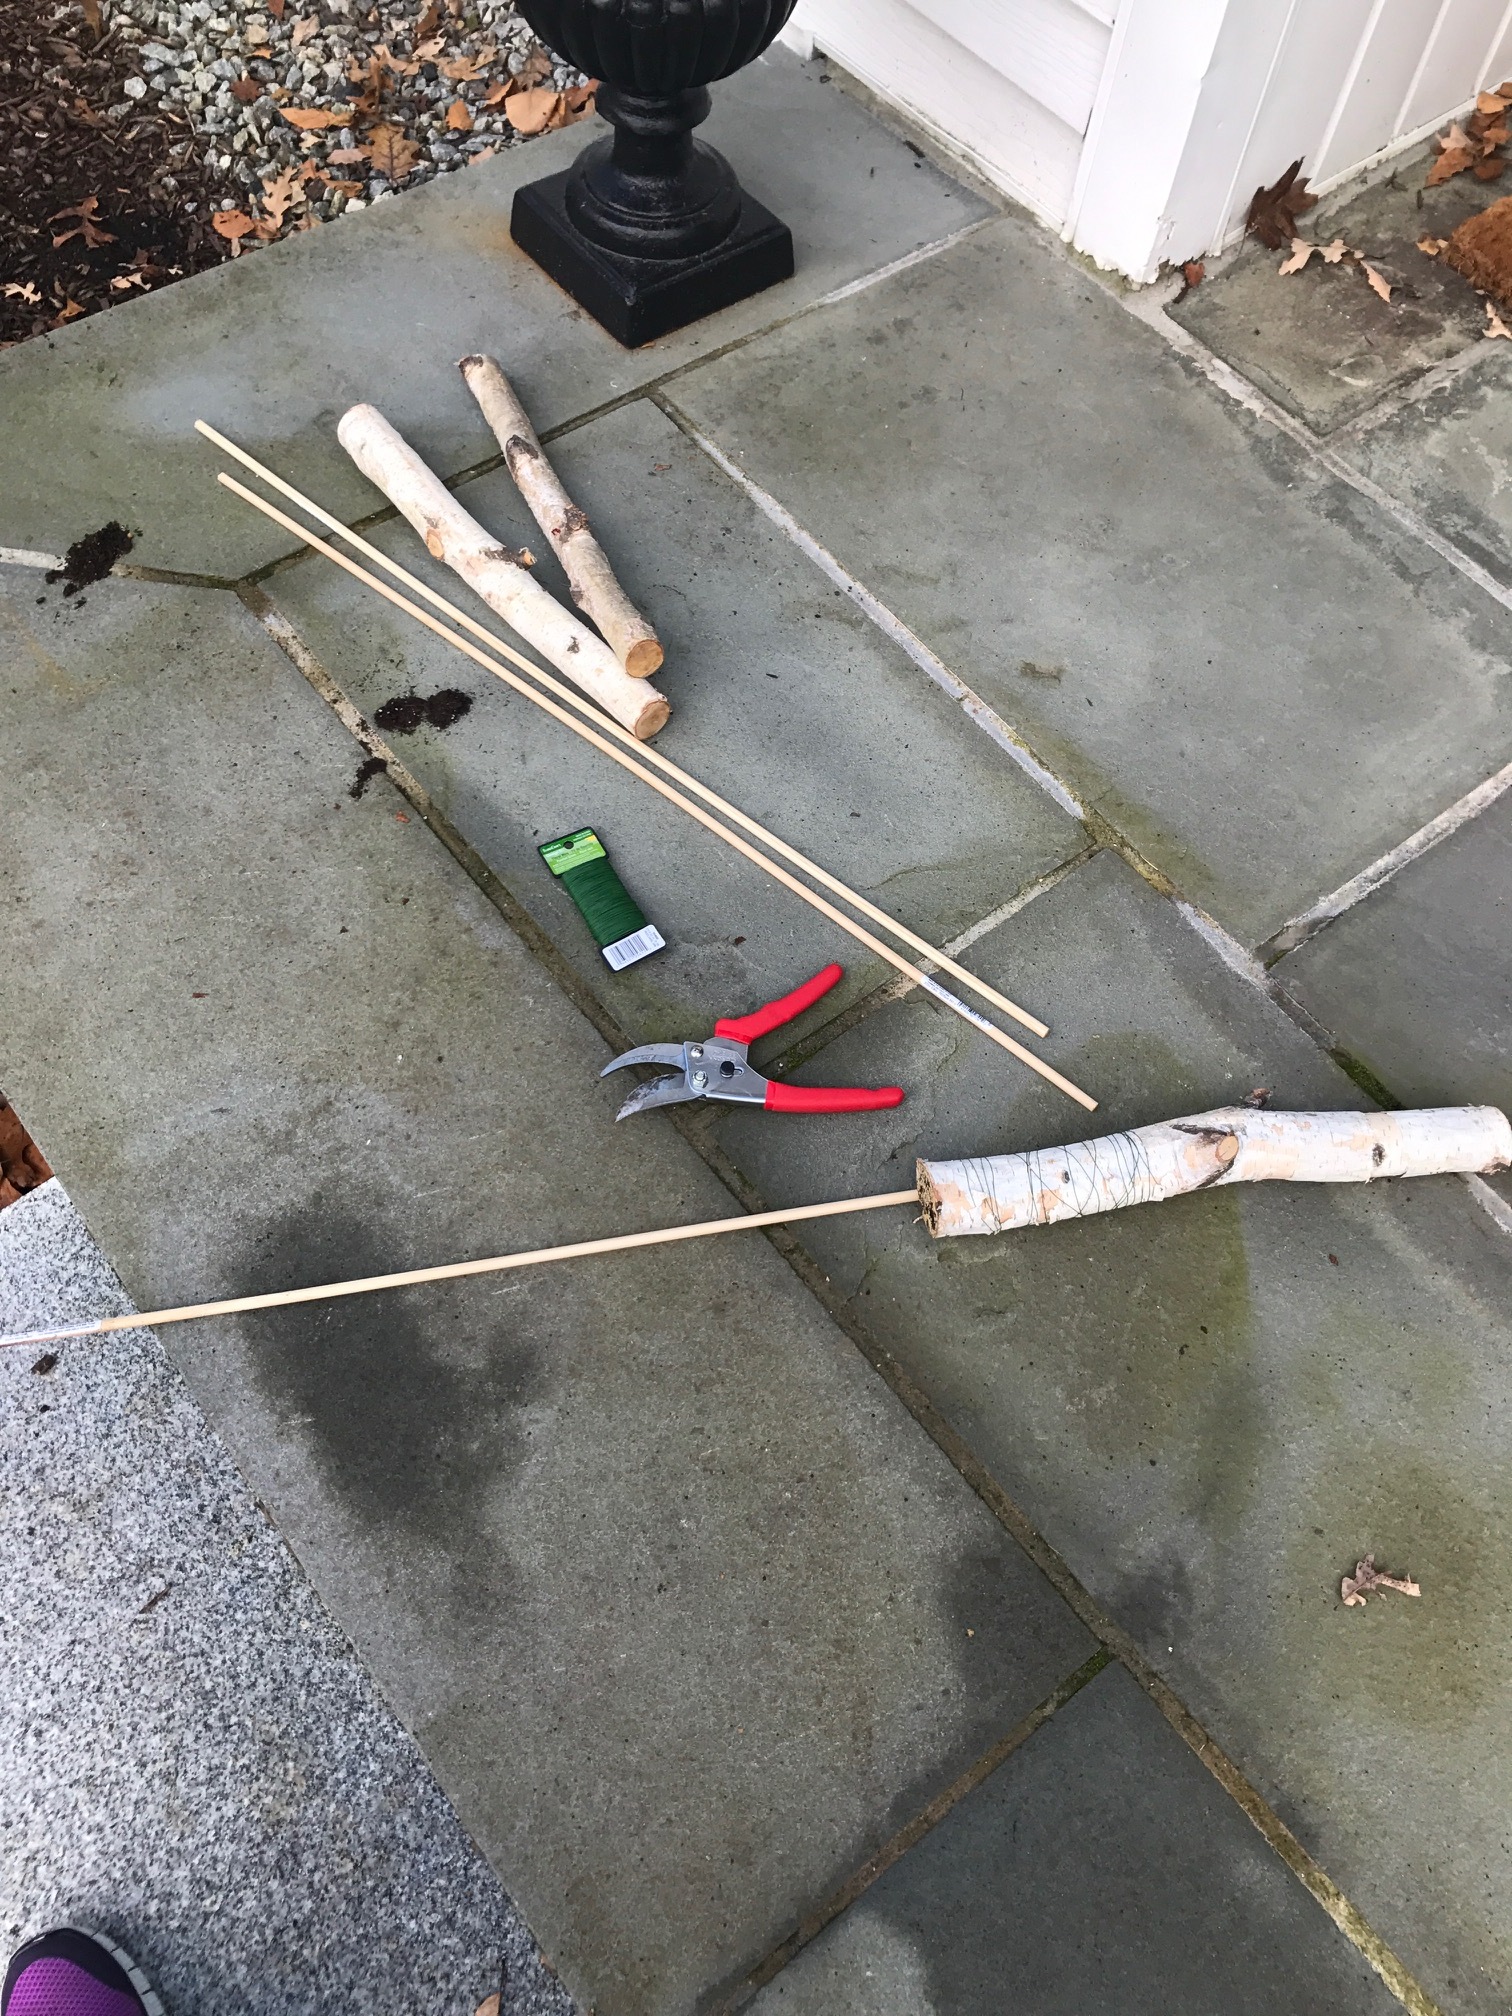
I did also buy 3 long wooden dowels to attach with floral wire to the birch logs to give them additional length and to more effectively secure them in my planters.
Step 2: Attach dowels to birch logs
To attach the dowels I just tightly wound floral wire around the birch logs and dowels.
Step 3: Insert birch poles
I liked groupings of 3 in each of my planters. I inserted them in the middle and slightly towards the back of the pot leaving room for pinecones and other lower greenery to go in the front.

Step 4: Insert greenery
I started with the back, behind the poles and added the shorter needle fir clippings. I wanted some hight and these hold up pretty well.
I then inserted the longer needle pine, which has a lighter and airier feeling. I inserted this along the front and allowed it to drape over the front of the urn. In the middle section I added the boxwood.

I then added holly towards the back, as well as some additional pieces of long needle pine to give it more texture. I placed the pinecones in the front between the boxwood and lastly inserted the artificial berries throughout.

For the arrangement in the olive bucket on my side porch, I essentially followed the same steps. Inside of the olive bucket is a plastic pot/liner filled with soil. I inserted the greens using a similar method as the urns and finished with a little cardinal pick insert which I purchased at Michaels.

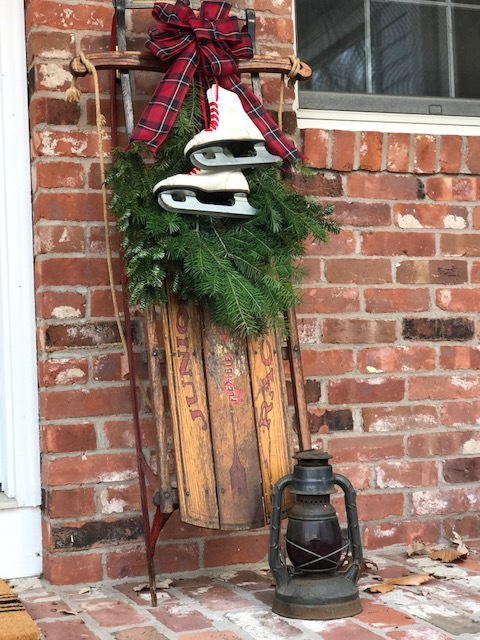
For my sled... I found it at a local antique shop; they are pretty common in antique and estate furniture stores and if you look around a lot of times you can find one ranging from around 20-50 bucks. I found the little old skates off of Facebook marketplace for one dollar! I just attached a bunch of greens using floral wire, then tied up the skates and added a bow. I made the bow myself using wire ribbon. Watch a few YouTube videos on how to make them - it is super easy and a lot cheaper than buying them pre-made.
My boxwood wreaths were purchased at Trader Joe's. The small welcome mat on my porch is by Hearth and Hand at Target. My personalized doormat is from Pottery Barn, and rocking chairs and are from Hayneedle. The old lantern I found in my grandmother's basement. The crate is old from HomeGoods, but I often see similar ones at Michael's.


I considered adding more lanterns, and wrapping the posts with pine garland but I decided against it. I think that sometimes less really is more and your end result is just simple and elegant.
Thanks so much for reading along and if you have any questions please feel free to message me!
xo,
Nicole


