

Cake Pop Tutorial-The Basics
Let me start off by saying that a lot of times I find the cute, novelty types of desserts to taste not so great. I had heard about cake pops being a "thing," but just assumed that they were overly jazzed up and cute bites of cake that would likely just crumble apart upon eating them. I was wrong. If you have ever made those Oreo ball truffles, they are more like those- a nice crisp outer chocolate candy shell with a moist and velvety textured inside. Yuuumm!!
The verdict is that cake pops are yummy, relatively easy to make, and adorable! They are always a huge hit at all of my parties, and I know if you give them a try you will love them too!
(In THIS post you can see my tractor themed pops, THIS post you can see my dinosaur themed pops,
So here is a run down of how to make these scrumptious treats.
First, essential tools and supplies:
* Store bought boxed cake mix and a tub of store bought icing
* A cake pan ( I just use a 9x13 Pyrex)
* A large mixing bowl
* A baking sheet lined with wax paper
* A large spoon,
* A small ice cream scoop (optional)
* Lollipop sticks (I buy Wilton brand found at local craft stores)
*Candy bags and ribbon, optional (if you want to cover your pops or make them favors)
* Candy melts (Wilton makes all kinds of fun colors also available at craft stores and Walmart, Ghirardelli makes melts that are more expensive and better tasting/quality, but only come in chocolate and white chocolate)
* A piece of floral foam or a cake pop decorating stand, which can be found at your local craft store or Walmart (the Dollar stores also have floral craft foam that is cheap and works great).
*Sprinkles, candy writing pens, other candy items, etc. that you may want to use for decorating your pops

Steps:
1. Bake your store bought cake mix according to the instructions on the package. Allow the cake to completely cool. You could even make the cake the day before and cover it so you have it ready.

2. Once cake has completely cooled, put the cake in a large mixing bowl, and using your fingers, crumble it until it is relatively fine in texture. You may also use a food processor, but I find your hands work just as well and I personally do not like cleaning extra appliances!


3. Gradually add in the store bought frosting. You will NOT be using the whole thing so only add a little bit at a time. I would say I use about a third of the tub. I find it can depend on the texture of the cake. For example, red velvet cake often comes out very moist so I end up using a little less frosting. If the cake is a little on the drier side you may end up adding a little more.

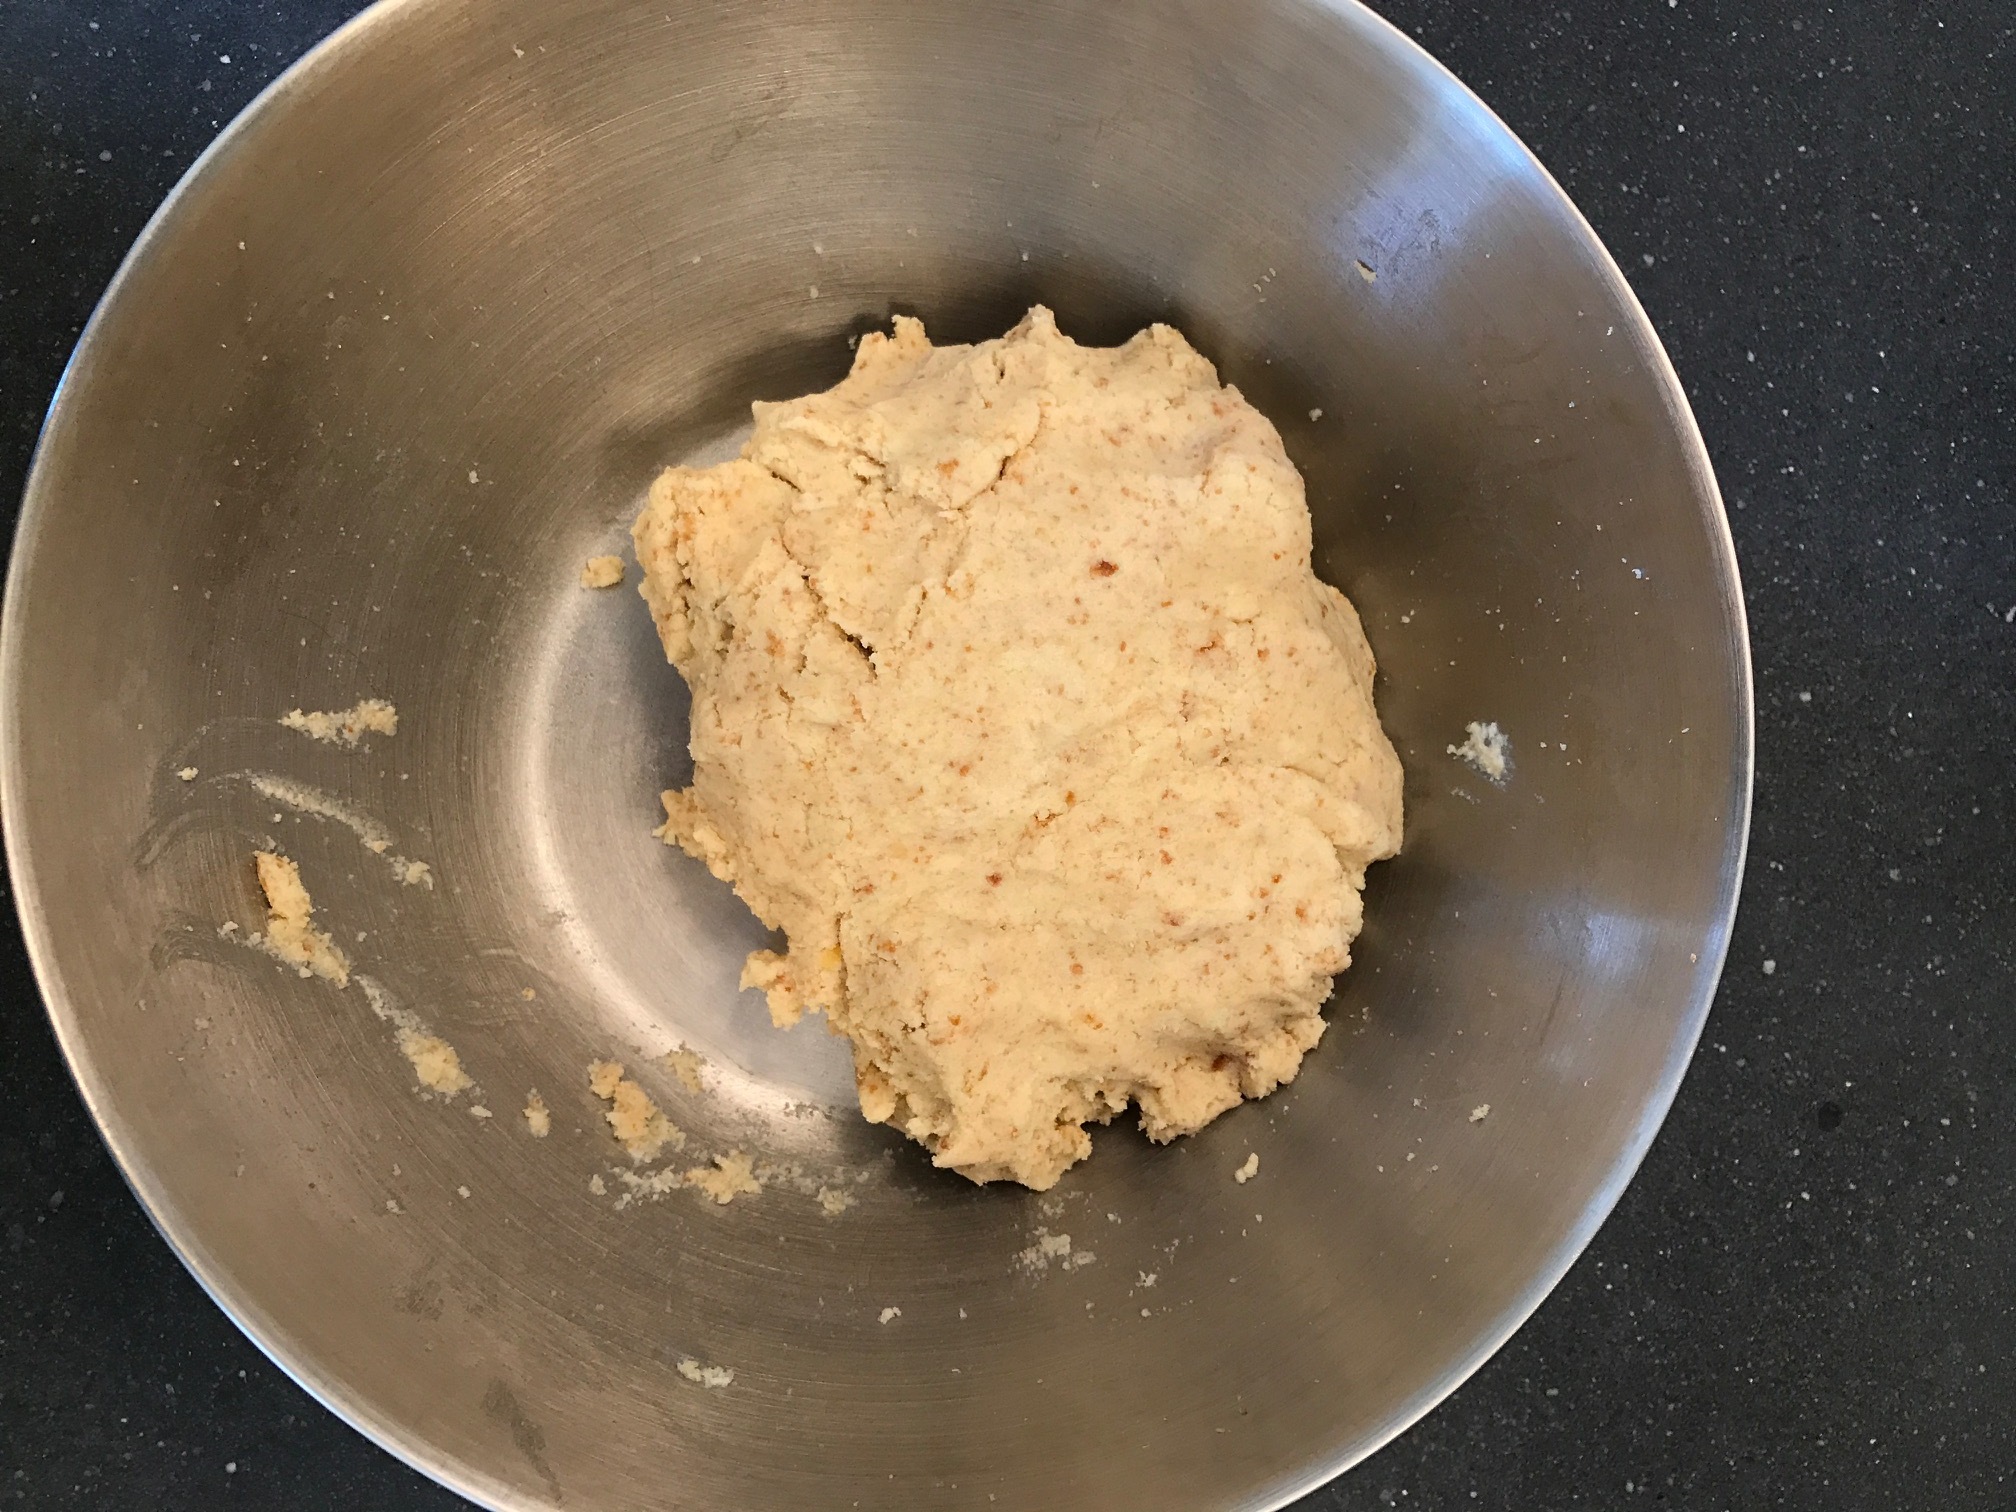
The key thing to look for is dough-like consistency. When you mix it (I find using the back of a large metal serving spoon to work best) and the mixture forms, and you can easily roll it into a ball, then you know it is good. It is better to have less icing and always add a little more. If you add too much icing the mixture will be too sticky and will fall apart.
3. Now it's time to shape your dough. If it is your first time experimenting with cake pops, I suggest you just go with balls. I use a smaller ice cream scoop and plop the scoops onto my wax paper lined baking sheet. Next, I go back and roll them into my palms until they are smooth and round.

4. Once all of your scoops are rolled you can place them into the refrigerator. Allow the pops to chill for at least 15-20 minutes. I often do mine the night before and leave them in the fridge overnight, which is completely fine.
5. When you are ready to dip, take a few out of the fridge at a time and let them get closer to room temperature. If your dough is too cold and you dip them in the warm chocolate you will end up with cracks, however, I find if the dough is too warm it can slip off of the stick. So I give them around 5-10 minutes outside of the fridge if they were in overnight.
6. Melt your chocolate or candy melts. I personally like using a microwave safe mug. You need the level of dip to be deep enough so that you can submerge the whole pop so I find bowls to be too shallow. You can use a double boiler to melt your chocolate, but I like the microwave. I start by microwaving on HALF POWER (for my micro I punch in 5) for about a minute. Check on it stir, and then add another 30 seconds. Keep microwaving for 10-30 seconds at a time, stir and check consistency. You want to just melt the chocolate so that it easily drips off of the spoon. Be careful not to overheat the chocolate as it will become too thick and difficult to dip in.

7. Dip the end of your lollipop stick into the melted candy/chocolate (about 1 -2 cm up the stick). Then insert the stick halfway into your ball. Do another few pops allowing your previous pops a minute to set. Then start with the first one you stuck the stick into and fully dip into the melted chocolate.
This part can be tricky and took me a few tries to get the hang of. You can dip straight down then move the pop back and forth so all sides are coated. I suggest watching a few YouTube videos on dipping, I found that helpful.
8. Once the pop is coated, either tap at your wrist or gently tap the stick against the mug to shake off any excess chocolate.
9. If you are going to add sprinkles do so now, and do so relatively quickly while the chocolate is still wet (it starts to dry pretty quickly).
10. Place your pops in a piece of styrofoam or a cake pop stand to dry.

These particular pops I was making for Halloween. You can see my full post on Halloween cake pops HERE.
Other Tips:
* You do not need to refrigerate, you can leave them out or cover them with little candy bags and tie with a twist tie or ribbon.
*They stay fresh and keep VERY well (air does not get to the cake because it is surrounded by the hard shell, hence them staying really fresh!). So if you have a party coming up you can make them a few days ahead of time.
*If the cake is falling off into the dip it is probably too warm. Pop it back into the fridge or even the freezer for a few minutes to set up again.
*Bakeralla, is the founder of cake popping. Her website is awesome, so check her out for more ideas and inspiration.
Please feel free to email me if you have any questions and send me pics of the cake pops you've made!! Enjoy friends!!
xo,
Nicole


